Most SEO professionals check Google Search Console the same way they did five years ago. Open a browser tab, log in, click through menus, export CSVs, repeat.
But what if you could just ask Claude to pull your ranking data, spot indexing issues, or analyze performance trends in plain English?
That’s exactly what the Model Context Protocol (MCP) enables. This guide walks you through connecting Google Search Console to Claude using Composio’s MCP integration. In under 10 minutes, you’ll have a working setup that lets Claude read your search data and take actions on your behalf.
Step-by-step setup process
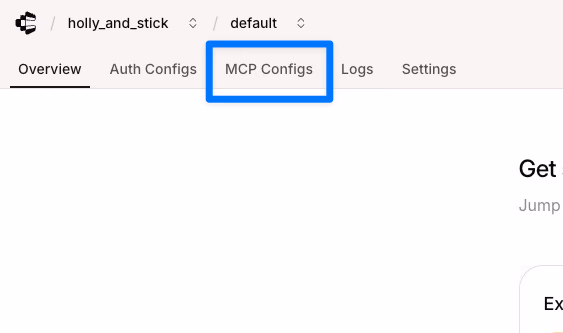
1. Navigating Composio for MCP setup
Start on the Composio dashboard. This tab lets you define what Claude can access.
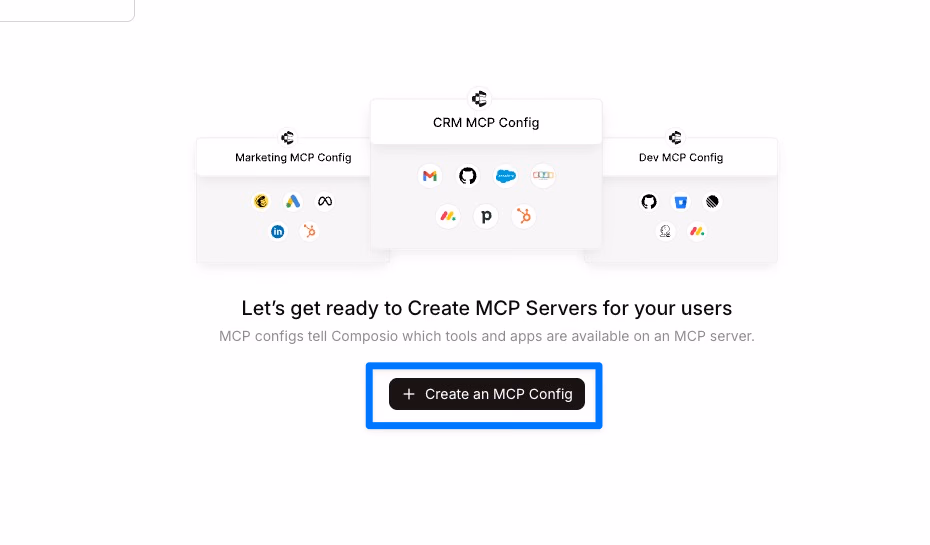
2. Starting the configuration: Creating an MCP server
Click “Create an MCP Config.” The UI groups integrations by category, such as marketing, CRM, and dev. Your goal is to create an MCP for Google Search Console. Click the “Create an MCP Config” button to proceed.
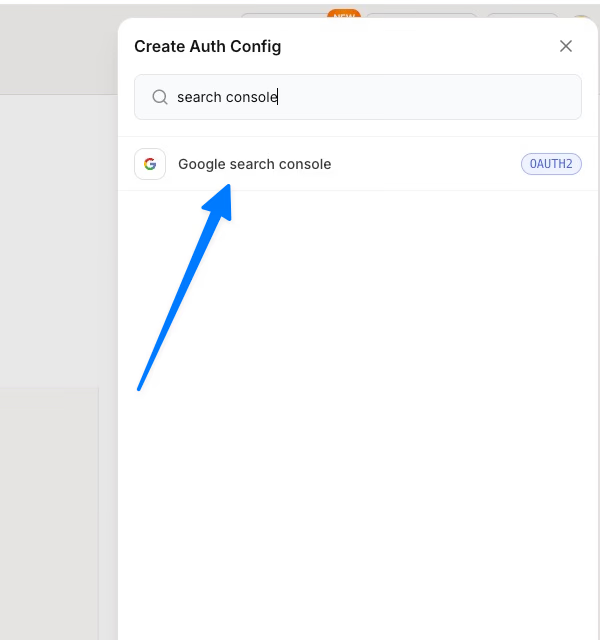
3. Authentication configuration: Linking to Google Search Console
Search for “Search console.” Select the result marked with the Google G and the OAuth2 label. Keep the default fields unless your Google setup is non-standard.
The next modal shows the OAuth scopes. These define what Claude can fetch. Click “Create Google search console Auth Config” to finalize this part.

Leave scopes at their defaults unless you require specific governance rules.
4. Tool selection and server creation
Choose which Google Search Console API capabilities the MCP can access: site listing, URL inspection, analytics, sitemaps, and more.
Most teams select all tools for broad access. You can check items individually or use “select all.”
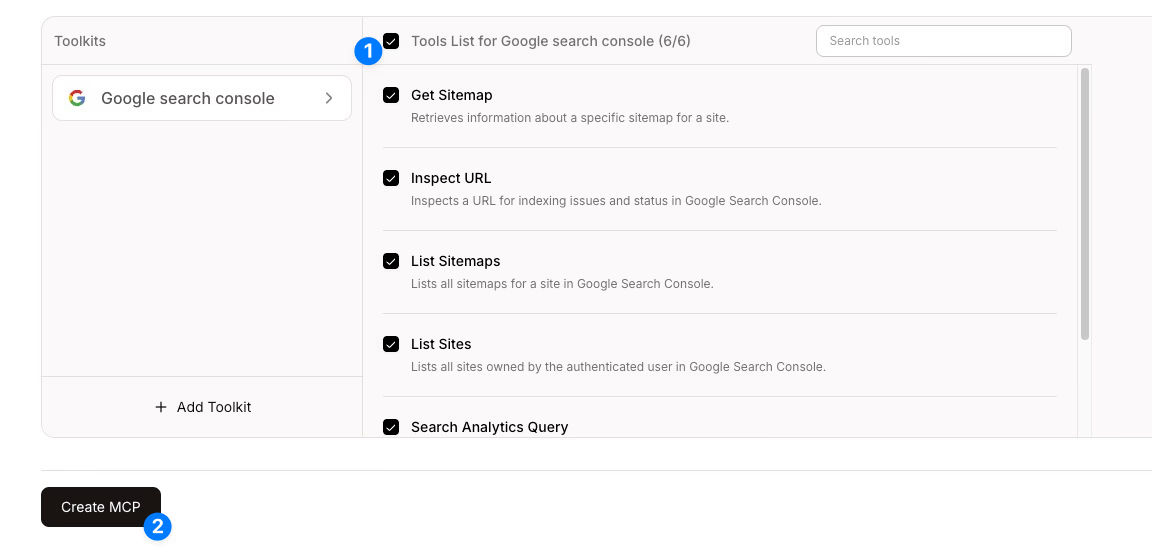
This selection defines the actions your AI client can perform once the connection is active.
5. Connecting your Google account
Link the Google account that holds the Search Console properties you want to monitor. The modal shows a “Connect Account” control next to your MCP’s name. Log in as you would to any SaaS tool.
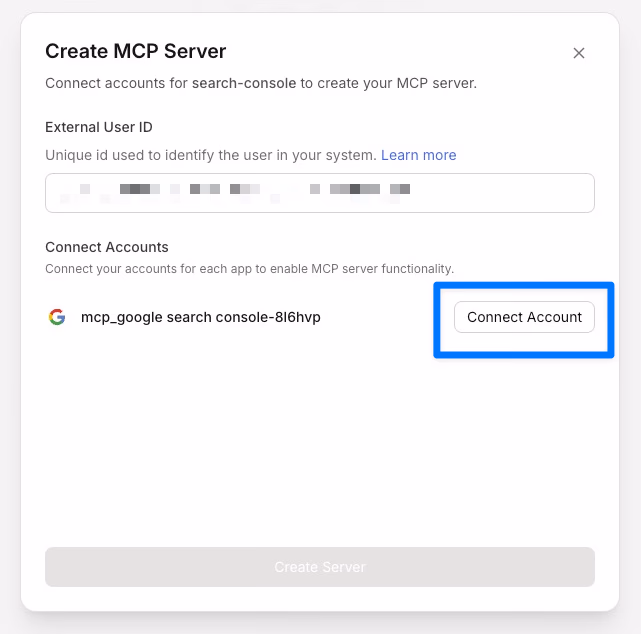
This step authorizes your connection.
6. Generating the Claude integration command
Composio creates a terminal command tailored to your AI, such as Claude. The command includes an npx command with flags and an API key for authentication. Copy this command.
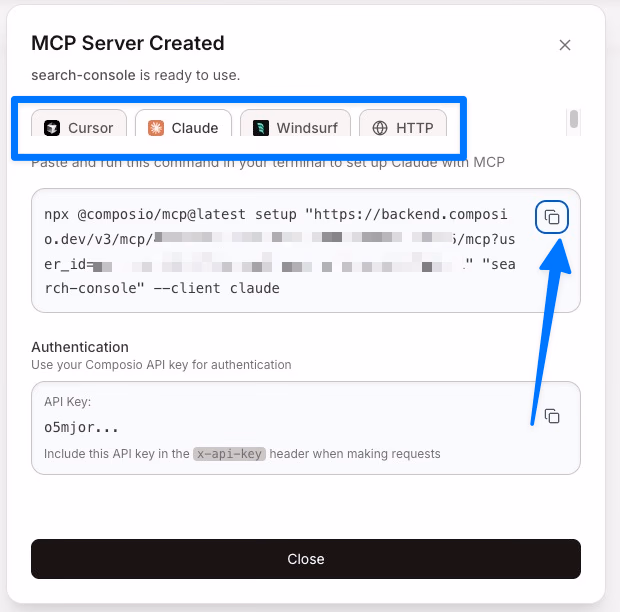
Paste it into the terminal on the machine running your AI client.
While this guide focuses on Claude, this specific MCP configuration can also be integrated into other AI platforms like Cursor or Windsurf using the same terminal commands.
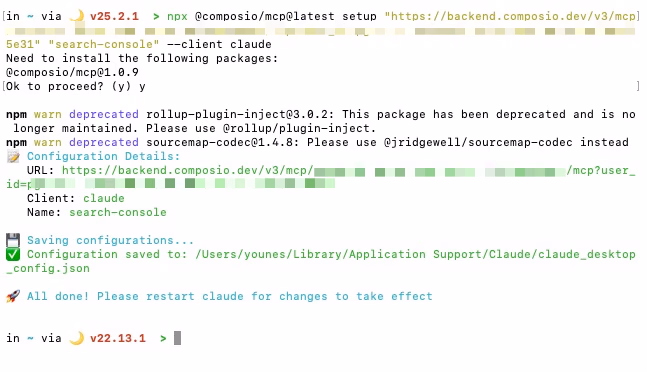
7. Completing setup in the terminal
The terminal installs packages, registers your API key, and saves the config locally. When it finishes, you’ll see a confirmation like “All done! Please restart Claude for changes to take effect.”
After this, the API configuration becomes usable tooling.
This process connects Google Search Console to Claude using MCP via Composio. Each step clearly guides you to make the integration practical, so your team can focus on analyzing and optimizing search data.
Configuring tool permissions and testing your connection
First, check that the MCP has been added to Claude (or the AI you chose) in Settings → Connectors:

Fine tuning permissions for Claude’s Search Console integration
After linking Google Search Console to Claude via Composio’s MCP, I recommend adjusting the permissions instead of using the default settings.
The permission interface separates read-only actions, such as listing properties or fetching performance data, from write/delete actions, like submitting sitemaps.
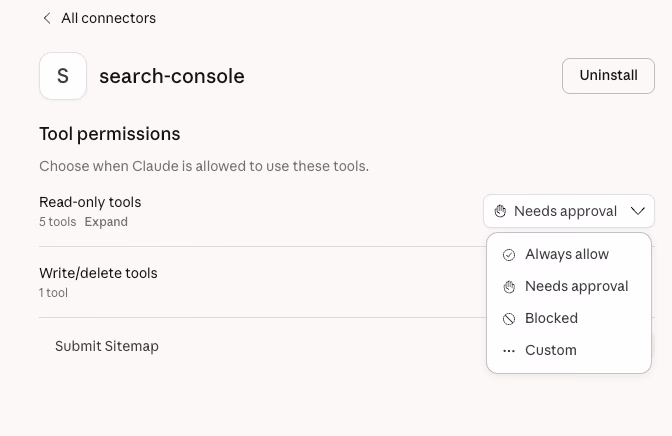
Prefer always allow for read-only tools
For each tool, you can choose from four options:
- Always allow: Claude can perform the action without asking.
- Needs approval: Claude prompts you before each sensitive action.
- Blocked: the action is disabled.
- Custom: a rule you define, for example, limiting actions to certain times or domains.
For solo founders or small teams, “Always allow” reduces friction for routine reporting and content operations. If your Search Console covers multiple brands or high-value sites, choose “Needs approval” or a Custom rule to reduce risk.
Testing the live connection
After installing the MCP with the npx command from Composio and setting permissions, verify the integration with these simple tests.
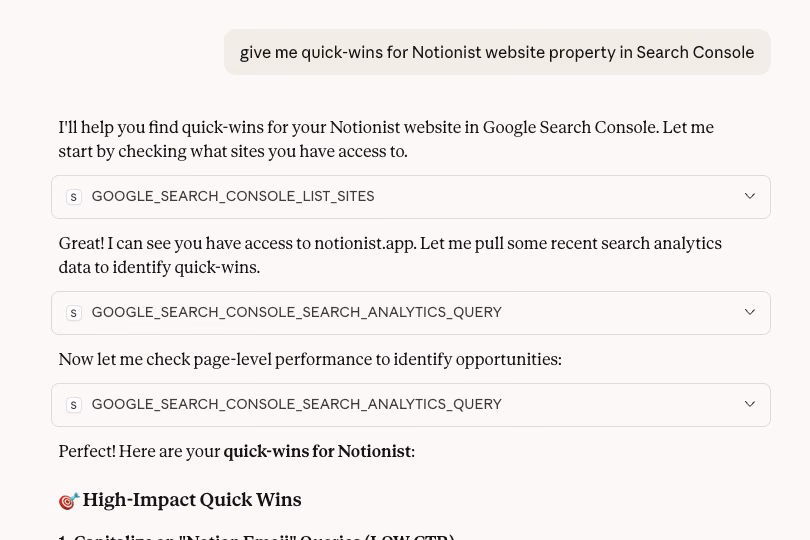
Begin with a read test by asking Claude to “List my Search Console properties.” If the connection is active, Claude will return your site list via the MCP.
If read tests succeed, run a write test only if you granted permission. Ask Claude to “submit a new sitemap” or “delete a site property.” Claude should perform the action and confirm it in chat.
Look for successful terminal messages and Composio modals showing the npx command and API key. These confirm the connection and authentication. If needed, revisit those places to repeat the setup.
Start querying your search data with Claude
You’ve now connected Google Search Console to Claude through Composio’s MCP integration. The setup covered creating an MCP config, authenticating with OAuth, selecting API tools, and configuring permissions.
From here, Claude can list your properties, fetch performance metrics, inspect URLs, and manage sitemaps. All through natural conversation.
Start with simple read queries to build confidence. Then explore write actions as your workflow demands. The real value emerges when you combine this integration with other MCP connections, like Google Analytics or your CMS, to create a unified SEO command center powered by AI.